5% off with code HELLO5
Hibiscus Care
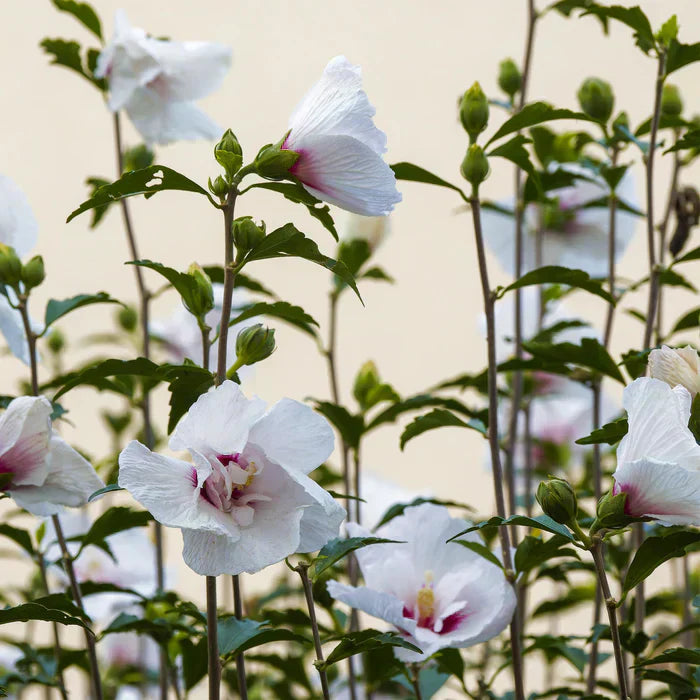
The Hibiscus is a beautiful, colorful garden plant that adds atmosphere and exotic flair to any garden or balcony with its large flowers. The hibiscus originates from tropical and subtropical regions of Asia, Africa, and the Caribbean, where it naturally occurs in warm and humid environments. This versatile plant can be grown both in the ground and in pots, and requires specific care to thrive optimally. In this blog, you will discover everything about the proper care of the hibiscus.

Watering the Hibiscus
One of the most important aspects of hibiscus care is proper watering. Hibiscuses like evenly moist soil, but do not tolerate wet feet well. This means you must water the plant regularly, especially during the growing season (spring and summer).
-
Check the soil regularly by sticking your finger about 2-3 cm deep into the soil. Does it feel dry? Then it is time to water.
-
Water generously so that the roots can drink enough, but ensure that excess water can drain away well to prevent root rot.
-
During hot summer days, daily watering may be necessary, especially for potted plants that dry out faster.
-
In autumn and winter, the hibiscus receives much less water, because the plant is dormant and requires less moisture. has.
Also note that when watering, you should preferably use lukewarm water and not spray the plant wet to prevent mold formation.

Hibiscus Location
The location largely determines the success of your hibiscus. This garden plant needs plenty of light, but can also be sensitive to strong midday sun, especially in pots.
-
Choose a spot with plenty of sun, preferably at least 6 hours a day, but with some shade during the hottest hours.
-
Avoid places with strong winds, as the branches and flowers can be damaged by them.
-
Hibiscus in a Pot Outdoors
For a hibiscus standing in a pot outdoors, there are a few extra points to consider:
-
Place the pot in a spot with sufficient sun, but ensure protection against strong winds and bright midday sun.
-
Use a pot with drainage holes and fill it with airy, nutritious potting soil.
-
Water more often than in open ground, because potting soil dries out faster.
-
In winter, you can move the pot to a frost-free, light place or insulate the pot with bubble wrap and a burlap sack.

Move Hibiscus
Do you want to move your hibiscus? The best time for this is in early spring or autumn, when the plant is not in active bloom.
-
Dig a spacious hole around the plant so that you keep the root ball as intact as possible.
-
Carefully move the plant and place it directly in the new soil or pot.
-
Give the hibiscus sufficient water after transplanting to allow the roots to help recover.
-
Avoid transplanting immediately during extreme heat or frost, as the plant may experience extra stress.
By transplanting at the right time and taking good care of the plant, your hibiscus can recover quickly and continue growing.

Steps for planting a hibiscus:
-
Choose the right moment: Spring is the ideal time to plant, because the risk of frost has passed by then and the plant has the entire warm growing season to establish itself.
-
-
Dig a spacious planting hole: Make the planting hole at least twice the size of the root ball, so that the roots have enough room to spread without being damaged.
-
Prepare the soil: Mix compost or well-rotted organic fertilizer into the soil. This improves soil structure and ensures good nutritional status.
-
Place the plant carefully: Place the hibiscus in the hole without bending or damaging the roots. Ensure the plant stands upright.
-
Fill in the hole and lightly press down the soil: This ensures a firm stand, without making the soil too compact so that the roots can grow well.
-
Water immediately: By thoroughly moistening the soil around the roots, you help air bubbles disappear and stimulate good root development.
-
Maintenance after planting: Keep the soil well moist during the first few weeks, but avoid waterlogging. Mulching with organic material can retain moisture and reduce weed growth.
Hibiscuses in pots require a new pot and fresh potting soil every 2 to 3 years to continue growing well. This prevents root suffocation and ensures that the plant receives sufficient nutrients.
By carefully following these steps, you lay a solid foundation for a healthy hibiscus that will produce beautiful flowers year after year.

Hibiscus Flowering Time
The hibiscus is best known for its beautiful, striking flowers that bring color and life to your garden. The flowering time of this popular garden plant depends on various factors, such as the type of hibiscus, care, and location. To get the most out of your hibiscus, it is important to know when you can enjoy its flowers and how to stimulate flowering. Below you will find an overview of what to expect and what to look out for:
-
The flowering period usually runs from late spring into early autumn.
-
Hibiscuses bloom primarily on new wood, so pruning stimulates flowering.
-
With proper care, some species can bloom multiple times per season.
-
Sufficient light, water, and nutrients are essential for long-lasting and abundant flowering.
With this knowledge, you can take optimal care of your hibiscus and fully enjoy its colorful flowers during the growing season.

Sowing Hibiscus
Steps for sowing hibiscus:
-
Use fresh seeds: Make sure to use fresh hibiscus seeds, as these have a higher germination rate and germinate faster.
-
Sow in early spring: This gives the young plants sufficient time to grow before it gets cold. Sow the seeds in a seed tray filled with light, well-draining, and moist potting soil.
-
Keep the soil moist: Ensure that the potting soil remains constantly slightly moist, but not wet, to prevent mold formation.
-
Provide a warm place: Place the seed tray in a warm location with a temperature between 20 and 25°C, which promotes germination.
-
Patience during germination: The seeds usually germinate within 2 to 4 weeks, but this may vary slightly depending on the species and conditions.
-
Transplanting and care: As soon as the young plants are large enough to handle, you can transplant them into individual pots. Ensure sufficient light and start providing nutrients to encourage strong, healthy plants.
With these steps, you increase the chance of successful germination and growing beautiful hibiscuses, so that you can soon enjoy your own home-grown garden plants.

Hibiscus Toxic
Most hibiscus species are not toxic to humans and pets such as dogs and cats. However, eating large quantities of leaves, flowers, or branches can cause gastrointestinal issues in these animals, such as vomiting and diarrhea. Therefore, it is wise to prevent dogs and cats from easily accessing the plant, so that they cannot eat large parts. Preferably place the hibiscus in a spot out of reach of curious pets to protect the health of both your plant and your animals.
Hibiscus Pruning
Pruning is an essential part of hibiscus care to keep the plant healthy and flowering.
-
Preferably prune in the spring, as soon as the frost is over.
-
Remove dead, damaged, and superfluous branches.
-
Cut back to just above an outward-growing bud to maintain a nice shape.
Do you want to know the best way to prune hibiscus? Then check out our extensive blog: Hibiscus Pruning.

Hibiscus Cuttings
Propagating hibiscus is a simple and effective way to multiply new plants. By using a healthy piece of an existing plant, you can root a new hibiscus and grow it into a strong plant within a few weeks. Taking cuttings is particularly popular because it yields results relatively quickly and allows you to easily propagate your favorite plant.
Steps for taking hibiscus cuttings:
-
Choose the right moment: The best time to take cuttings is in spring or early summer, when the plant is actively growing and the cutting has the best chance of rooting.
-
Cut off a young, healthy branch about 10 to 15 centimeters long. Ensure that the cutting has at least a few leaf buds.
-
Prepare the cutting: Remove the lower leaves from the cutting so that there is enough room to place it in the cutting soil, and there is less moisture loss.
-
Place the cutting in moist cutting soil: Place the cutting in a small pot with special, well-draining cutting soil that is moist but not wet. This stimulates root formation.
-
Ensure the right conditions: Place the pot in a warm, bright spot, but avoid direct sunlight that can dry out the cutting. A temperature around 20-25°C is ideal.
-
Wait for root formation: After a few weeks, roots will develop. You can check this by gently pulling on the cutting; If there is resistance, the roots are well developed.
-
Planting out: As soon as the cutting has sufficient roots, you can transplant it to a larger pot or directly into the garden, depending on the season and conditions.
With this method, you can easily grow new hibiscuses and expand your collection without having to buy new plants.

Fertilizing Hibiscus
Good nutrition is essential for a healthy and flowering hibiscus. With the right fertilizers and fertilization routine, you help the plant grow strong and develop abundant flowers. Below you will find the most important points to keep in mind when fertilizing your hibiscus:
-
During the growing season, use a fertilizer specifically developed for flowering plants.
-
Fertilize approximately every two weeks, but always follow the dosage instructions on the packaging.
-
Avoid over-fertilization, as this can be harmful to the roots and damage the plant. data-start="710" data-end="813">
Stop fertilizing in the autumn and winter to respect the plant's natural dormancy period.
-
For potted plants, it is important to regularly add fresh potting soil or repot to maintain nutrient levels.
With these tips, you ensure your hibiscus receives the right nutrition to stay healthy and strong throughout the entire growing season.

Hibiscus Nutrition
Proper nutrition is crucial for the well-being and flowering of your hibiscus. This garden plant needs sufficient nutrients during the growing season to bloom profusely and stay healthy. By providing the right nutrition, you not only support the growth of leaves and flowers, but also strengthen the plant's resistance to diseases and stress. Important points to consider regarding hibiscus nutrition are:
-
Use a fertilizer specifically for flowering plants: these contain a balanced mix of nitrogen (N), phosphorus (P), and potassium (K), with phosphorus being important for flowering.
-
Fertilize regularly, but in moderation: approximately every two weeks during the growing season, so that the plant receives continuous nutrition without being overloaded.
-
Choose liquid fertilizer or granules: liquid fertilizer works quickly and is easy to adjust, while granules work slowly and provide long-lasting nutrition.
-
Stop fertilizing during the dormant period: in autumn and winter, the need for nutrients decreases, because the plant is less active.
-
Add organic matter to the soil: such as compost or well-rotted manure, which improve soil structure and replenish nutrient reserves.
By applying these nutritional principles, your hibiscus gets everything it needs to grow, bloom, and stay healthy. Also, don't forget to water the plant regularly, as nutrients work best when the soil is moist.

Hibiscus Snails
Snails can be quite a challenge for anyone who has hibiscuses in the garden or on the balcony. These soft garden plants are a favorite snack for snails, which can lead to damaged leaves and weakened plants. To properly protect your hibiscus against snails, it is useful to know what measures you can take. Here is an overview of effective tips:
-
Keep the area around the hibiscus clean and free of leaves and twigs where snails can hide.
-
Check your plants regularly, especially in the evening or morning, and remove snails by hand.
-
Use environmentally friendly slug pellets if the infestation is severe, but be careful regarding the effect on other animals.
-
Encourage natural enemies of snails, such as hedgehogs, toads, and birds, in your garden.
-
Provide a dry and airy location, as snails love damp and dark places.
With these tips, you can prevent snails from seriously damaging your hibiscus and keep your plant healthy and strong. Read more in our extensive blog: Controlling Snails!

Hibiscus Diseases
Hibiscuses are beautiful garden plants, but unfortunately, they can also suffer from various diseases and pests. It is important to be alert to the signs of problems so that you can intervene quickly and keep your plant healthy. The most common diseases in hibiscus are often related to moisture problems, pests, or a weakened resistance of the plant.
Common problems in hibiscus are:
-
Root rot: is caused by soil that is too wet, causing the roots to suffocate and die. This can severely weaken the plant and even kill it.
-
Aphids: small insects that feed on the sap of young shoots and leaves, causing them to deform and weaken.
-
Fungi: fungal diseases can develop when leaves remain wet for extended periods, especially with poor air circulation. This leads to spots and damage on the leaves.
Prevention is essential to prevent diseases. Therefore, ensure a good location with sufficient light and air circulation, and prevent the soil from becoming too wet by, for example, ensuring good drainage or avoiding waterlogging. Check your hibiscus regularly for signs of disease and pests so that you can intervene early.
Upon noticing a disease, it is wise to immediately cut away the affected parts to prevent further spread. You can also use organic pesticides, if necessary, that are safe for the plant and the environment.
With proper care and attentiveness, you will keep your hibiscus healthy and enjoy this colorful garden plant for longer.

Hibiscus yellow leaves
Yellowing leaves on a hibiscus are a common problem and can have various causes. It is important to determine in time why the leaves are turning yellow, so that you can take the right measures to keep your plant healthy. Yellow leaves can indicate nutrient deficiencies, water problems, or environmental factors that stress the plant. Below you will find the main causes of yellow leaves in hibiscus:
-
Too much or too little water: Overwatering can cause root rot, while soil that is too dry stresses the plant.
-
A deficiency in essential nutrients, such as nitrogen, can lead to yellowing of the leaves.
-
Incorrect location: Too little light or too much direct sunlight can damage the leaves and cause them to turn yellow.
-
Temperature fluctuations: Sudden changes in temperature or drafts can stress the plant.
-
Diseases or pests: Sometimes aphids, spider mites, or fungal diseases cause the leaves to turn yellow.
By keeping a close eye on these points and making adjustments to the care where necessary, you can prevent or limit yellow leaves on your hibiscus.


