5% off with code HELLO5
Fern Care
Ferns are popular houseplants that bring a touch of greenery and freshness into your home. With their graceful leaves and lush growth, they are a beautiful addition to any room. Ferns come in various types, each with its own unique characteristics and care requirements. In this blog, we dive deep into the world of ferns and give you all the information you need to keep your ferns healthy and happy.

Fern Species
There are many different types of ferns, each with unique characteristics and requirements. Some popular fern species that we offer at Planten247 are:
- Phlebodium: Known for its attractive, wavy leaves and easy care. This plant is also known as Blue fern.
- Asplenium: This fern has beautiful, glossy leaves and grows well in various environments.
- Dicksonia: An impressive fern known for its large, sturdy leaves and robust growth.
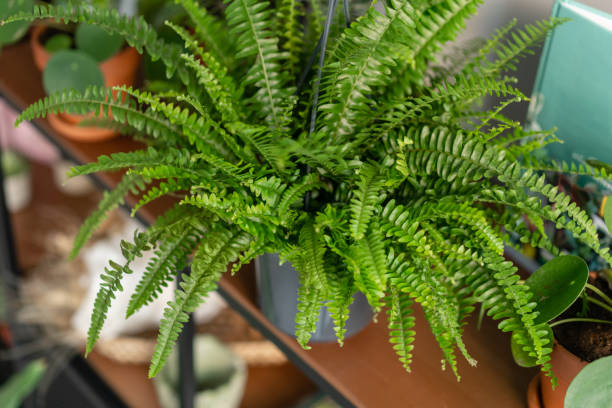
- Nephrolepis: Also known as the Boston fern or Curly fern, valued for its lush, hanging leaves.
- Stammer fern: Has striking, staghorn-like leaves and is a real eye-catcher.
View our full range or read more about each species to find the perfect fern for your space.
Watering Ferns
Watering is crucial for the health of your fern. Ferns are plants that naturally grow in moist, shady environments, such as in the undergrowth of forests. They thrive in a moist environment but cannot tolerate standing water. Finding the right balance in watering is essential to keep your fern healthy, green, and lush. Overwatering can lead to root rot, while too little water can cause the leaves to wilt and turn brown. In this section, we discuss how often to water your fern, how to check if your fern needs water, and provide tips for misting your fern. data-sizes="auto" data-src="https://cdn.shopify.com/s/files/1/0804/7319/4829/files/Varen_Water_Geven.jpg?v=1722252672" data-srcset="https://cdn.shopify.com/s/files/1/0804/7319/4829/files/Varen_Water_Geven_1800x.jpg?v=1722252672 1800w, https://cdn.shopify.com/s/files/1/0804/7319/4829/files/Varen_Water_Geven_1600x.jpg?v=1722252672 1600w, https://cdn.shopify.com/s/files/1/0804/7319/4829/files/Varen_Water_Geven_1400x.jpg?v=1722252672 1400w, https://cdn.shopify.com/s/files/1/0804/7319/4829/files/Varen_Water_Geven_1200x.jpg?v=1722252672 1200w, https://cdn.shopify.com/s/files/1/0804/7319/4829/files/Varen_Water_Geven_1000x.jpg?v=1722252672 1000w, https://cdn.shopify.com/s/files/1/0804/7319/4829/files/Varen_Water_Geven_800x.jpg?v=1722252672 800w, https://cdn.shopify.com/s/files/1/0804/7319/4829/files/Varen_Water_Geven_600x.jpg?v=1722252672 600w, https://cdn.shopify.com/s/files/1/0804/7319/4829/files/Varen_Water_Geven_400x.jpg?v=1722252672 400w">
How Often Should I Water My Fern?
The frequency with which you should water your fern depends on various factors such as the type of fern, the pot size, the ambient temperature, and the humidity in your home. Generally, ferns need water one to two times a week. During the winter months, when growth slows, you can reduce watering. Keep in mind that the top layer of potting soil may dry out slightly between waterings, but the soil must never dry out completely.
How Do I Check If My Fern Needs Water?
Checking the moisture of the potting soil is a simple way to determine if your fern needs water. Stick your finger about 2-3 cm into the potting soil. If the soil feels dry, it is time to water. You can also use a moisture meter for a more accurate measurement. Ensure the pot has good drainage to prevent water from accumulating at the bottom of the pot, which can cause root rot.
Tips for Watering Your Fern
- Use lukewarm water to water your fern, as cold water can damage the roots.
- Water until it runs out of the drainage holes at the bottom of the pot and pour excess water out of the saucer.
- Place the pot on a saucer with pebbles and water to increase the humidity around the plant without the roots standing in water.
Spraying Ferns
In addition to watering, many ferns also like regular spraying. This helps to increase the humidity around the plant, which is essential for their growth and health. Spraying can be especially important during the winter months when the air in the house is drier due to heating.

Fern Location
The right location is essential for the health and growth of your fern. Ferns are accustomed to the shady and damp environments of forests and thrive best in similar conditions indoors. Finding the perfect spot for your fern can make a big difference in how well the plant grows and blooms.
What is the Best Location for My Fern?
Ferns love a bright spot with indirect sunlight. Direct sunlight can burn the delicate leaves, while too little light can hinder growth. A spot by a north- or east-facing window is often ideal. Here they get sufficient light without being exposed to the bright midday sun.
Can I Put My Fern Outside?
Ferns can be placed outside during the summer months, but ensure that they are in the shade and protected from direct sunlight and strong winds. Bring the fern indoors before temperatures drop too much in the autumn.
What To Do About Too Little Light for a Fern?
If you notice that your fern is not getting enough light, you can consider placing it closer to a window or using grow lights. These lights can help meet your fern's light needs, especially during the dark winter months.
What To Do With Too Much Light for a Fern?
With too much light, the leaves of your fern can discolor and burn. Move your fern to a spot with less direct sunlight, such as further away from the window or behind a translucent curtain.
Tips for Choosing the Right Location for a Fern
- Temperature: Ferns prefer a stable temperature between 18-24°C. Avoid drafty places, such as near doors or windows that are often left open.
- Humidity: Ferns require high humidity. Place the pot on a tray with pebbles and water or use a humidifier to increase the humidity around the plant. Space: Give your fern sufficient room to grow. Ferns can grow in width and need space to develop fully.
With the right location, your fern will flourish and be a beautiful, lush addition to your interior. By taking into account their natural preferences for light, temperature, and humidity, you ensure that your fern can develop to its full potential.

Repotting Ferns
Ferns grow quickly and occasionally need a new pot to continue growing. Repotting ensures that the roots have sufficient space and access to fresh nutrients, which is essential for a healthy plant. In this section, we discuss when and how best to repot your fern.
When Should I Repot My Fern?
It is best to repot your fern every 1-2 years, preferably in the spring when the growth phase begins. This is the time of year when the plant actively produces new roots and leaves, allowing them to adapt more quickly to their new environment.
How Do I Repot My Fern?
Repotting can be a simple process if you follow the right steps. Here is a step-by-step guide:
1. Preparation:
- Choose a pot that is one size larger than the current pot. Ensure the pot has drainage holes to promote water drainage.
- Prepare a fresh, well-draining potting mix. A mixture of potting soil and peat moss works well for most ferns.
2. Removing the Fern from the Current Pot:
- Water the fern a few hours before repotting to hydrate the roots.
- Gently hold the plant by the base of the leaves and turn the pot upside down to slide the fern out. If the plant is stuck, gently tap the sides of the pot to loosen the roots.
3. Inspecting and Pruning Roots:
- Check the roots for signs of rot or damage and prune them off if necessary with a sterile knife or pruning shears.
- Remove excess old potting soil still clinging to the roots, but be careful not to damage the roots.
4. Placing in the New Pot:
- Add a layer of fresh potting soil to the bottom of the new pot.
- Place the fern in the center of the pot and fill the space around the roots with more potting soil. Press the soil down lightly to remove air pockets.
5. Watering:
- Water the plant thoroughly after repotting to help the roots settle. Ensure that excess water can drain away through the drainage holes.
6. Aftercare:
- Place the repotted fern in its usual location and avoid direct sunlight for the first few weeks. This helps the plant adapt to the new pot.

Fertilizing Ferns
Fertilization is essential to keep your fern healthy and strong. Ferns need nutrients to grow well and remain lush green. In this section, we discuss how and when it is best to fertilize your fern, and which type of fertilizer is most suitable.
When Should I Fertilize My Fern?
Ferns usually need extra nutrients during their growing season, which runs from early spring to late summer. During this period, you can fertilize your fern every 4-6 weeks. In autumn and winter, when the plant is dormant, you can reduce or stop fertilization altogether, as growth slows down then.
What Type of Fertilizer Should I Use for my Fern?
Use a balanced, water-soluble fertilizer or a liquid houseplant fertilizer. A fertilizer with an N-P-K ratio of, for example, 20-20-20 is suitable for ferns. This ratio indicates that the fertilizer contains equal parts nitrogen (N), phosphorus (P), and potassium (K), which contributes to balanced growth.
How Should I Fertilize My Fern?
1. Preparation of the Fertilizer:
- Dilute the liquid fertilizer according to the directions on the packaging. It is usually recommended to dilute the fertilizer to half of the recommended concentration to prevent the roots from burning.
2. Applying the Fertilizer:
- Water your fern first before applying the diluted fertilizer. This prevents the roots from coming into direct contact with the concentrated fertilizer, which can cause damage.
- Pour the diluted fertilizer slowly and evenly around the base of the plant so that it reaches the roots well.
3. Aftercare:
- After fertilizing, watch for signs of over-fertilization, such as yellowing of the leaves or leaf burn. If you notice these symptoms, water immediately to flush the excess fertilizers out of the soil.
Fern Potting Soil
The right potting soil is essential for a healthy fern. Ferns need well-draining and moisture-retaining potting soil to grow optimally. An ideal potting mix for ferns consists of peat moss, perlite, leaf mould, and finely ground bark. Peat moss retains moisture without becoming waterlogged, perlite ensures good drainage, leaf mould adds nutrients, and bark improves soil structure. If you do not have time to make your own mix, choose ready-made potting soil specifically formulated for ferns or epiphytic plants. Ensure the pot has good drainage holes to drain excess water and use a pot that matches the size of the fern to prevent root rot.
Fern Propagation
Ferns are beautiful, lush plants that bring a touch of greenery and freshness to any interior. Propagating ferns is a great way to expand your plant collection at no extra cost. In this guide, you will learn how to propagate and care for ferns in a simple way.
Supplies Fern Propagation
Before you begin, make sure you have the following materials on hand:
- A healthy mother plant
- Sharp and clean knife or scissors
- Pots or planters
- Potting soil suitable for ferns (airy and well permeable)
- Transparent plastic bags or a propagator
- Water mister
Step 1: Choose the Right Time
The best time to take cuttings from ferns is in spring or early summer, when the plant is actively growing. This increases the chance of successful rooting and growth.
Step 2: Prepare the Mother Plant
Choose a healthy and strong mother plant with sufficient roots and leaves. Water the plant a few days in advance so that the roots are well hydrated.
Step 3: Select and Cut the Cuttings
Look for offshoots or small plants (pups) at the base of the mother plant. These offshoots often already have small roots. Carefully cut the offshoots from the mother plant with a sharp and clean knife or scissors. Ensure that part of the roots remains attached to the cutting.
Step 4: Plant the Cuttings
Fill the pots or planters with airy and well-draining potting soil suitable for ferns. Make a small hole in the potting soil and place the cutting in it. Lightly press the soil around the cutting to hold it in place.
Step 5: Create a Humid Environment
Ferns love a humid environment. Cover the pots with clear plastic bags or place them in a propagator to create a mini-greenhouse effect. This helps to keep the humidity high, which is essential for root formation.
Step 6: Caring for the Cuttings
Place the cuttings in a bright spot, but avoid direct sunlight, as this can burn the young plants. Ensure that the potting soil is always slightly moist, but not waterlogged. Use a mister to spray the cuttings regularly and keep the humidity high.
Step 7: Patience and Growth
It may take several weeks for the cuttings to form sufficient roots. Be patient and continue to ensure a humid environment. As soon as the cuttings start forming new leaves, this means they are well rooted.
Step 8: Repotting
When the new ferns are strong enough and well rooted, you can repot them into a larger pot or their final location in your home or garden. Continue caring for the plants by watering regularly and misting them occasionally to keep humidity high.
Tips and Advice Fern Propagation
- Ferns thrive best in indirect light and humid conditions.
- Always use clean tools to minimize the risk of infections.
- Ensure well-draining potting soil to prevent root rot.
With these steps, you can easily propagate your own ferns propagate and enjoy a lush green oasis in your home or garden. Good luck!

Varen Giftig
De meeste varens zijn niet giftig, maar het is altijd goed om te controleren voordat je een nieuwe plant in huis haalt. Bepaalde soorten varens zijn echter wel giftig. Pas hierbij op met kinderen en huisdieren. Neem bij inname of twijfel altijd contact op met de huis-/dierenarts.

Varen Snoeien
Het snoeien van varens is belangrijk voor hun gezondheid en groei. Hier zijn de stappen die je kunt volgen om varens op de juiste manier te snoeien:
1. Benodigdheden:
- Scherpe, schone snoeischaar of tuinschaar
- Handschoenen (optioneel)
2. Timing:
- Snoei varens in het vroege voorjaar, voordat de nieuwe groei begint. Dit geeft de plant de kans om zich te herstellen en te gedijen tijdens het groeiseizoen.
3. Verwijder dode of beschadigde bladeren:
- Zoek naar bladeren die bruin, droog of beschadigd zijn.
- Knip deze bladeren zo dicht mogelijk bij de basis van de plant af om ruimte te maken voor nieuwe groei.
4. Dunnen van de plant:
- Als de varen te dichtbegroeid is, verwijder dan enkele van de oudste bladeren om luchtcirculatie te bevorderen en ruimte te maken voor nieuwe scheuten.
- Knip de bladeren bij de basis van de plant af.
5. Vorm geven:
- Snoei indien nodig om de vorm van de plant te behouden of te verbeteren. Verwijder overhangende bladeren of takken die de gewenste vorm verstoren.
6. Onderhoud:
- Controleer regelmatig op nieuwe dode of beschadigde bladeren en verwijder deze om de plant gezond te houden.
7. Verzorging na het snoeien:
- Geef de varen na het snoeien goed water en zorg voor voldoende licht, maar vermijd direct zonlicht.
- Houd de grond vochtig, maar niet te nat.
Door deze stappen te volgen, zorg je ervoor dat je varens gezond blijven en goed blijven groeien.

Waarom krijgt mijn Varen Bruine Bladeren?
Bruine of gele bladeren bij een varen kunnen verschillende oorzaken hebben. Hier zijn enkele veelvoorkomende redenen en hoe je ze kunt oplossen:
1. Onvoldoende Water:
- Oorzaak: Varens hebben doorgaans een constante vochtigheid nodig. Te weinig water kan leiden tot bruine, droge bladeren.
- Oplossing: Zorg ervoor dat de grond altijd licht vochtig is. Geef regelmatig water, maar vermijd een doorweekte grond. Controleer de vochtigheid van de grond door je vinger een paar centimeter in de aarde te steken; als het droog aanvoelt, is het tijd om te wateren.
2. Te Veel Water:
- Oorzaak: Overbewatering kan wortelrot veroorzaken, wat kan resulteren in bruine bladeren.
- Oplossing: Zorg ervoor dat de pot goede drainage heeft en laat de bovenste laag van de grond uitdrogen tussen de waterbeurten. Vermijd dat de wortels in stilstaand water staan.
3. Luchtvochtigheid:
- Oorzaak: Varens houden van hoge luchtvochtigheid. Te droge lucht kan de bladeren doen verwelken en bruin worden.
- Oplossing: Verhoog de luchtvochtigheid rond de plant door een luchtbevochtiger te gebruiken, een schaal met water naast de plant te plaatsen, of de plant regelmatig te besproeien.
4. Directe Zon:
- Oorzaak: Varens doen het beter in indirect licht. Directe zon kan de bladeren verbranden, waardoor ze bruin en krokant worden.
- Oplossing: Plaats de varen op een locatie met helder, indirect licht. Vermijd direct zonlicht.
5. Temperatuurschommelingen:
- Oorzaak: Varens zijn gevoelig voor temperatuurveranderingen. Extreme hitte of kou kan de bladeren beschadigen.
- Oplossing: Zorg voor een stabiele omgeving met een gematigde temperatuur. Vermijd plaatsen dicht bij radiatoren, ventilatoren of luchtcirculatie.
6. Voedingsgebrek:
- Oorzaak: Een tekort aan voedingsstoffen kan ook leiden tot bruine bladeren.
- Oplossing: Voed de plant af en toe met een uitgebalanceerde kamerplantenvoeding, maar zorg ervoor dat je de aanbevolen dosering volgt om overbemesting te voorkomen.
7. Plaag- of Ziekteinfecties:
- Oorzaak: Schimmels, bacteriën of insecten kunnen de bladeren aantasten en bruine vlekken veroorzaken.
- Oplossing: Controleer de plant regelmatig op tekenen van plagen of ziekten. Gebruik indien nodig een geschikt bestrijdingsmiddel of neem contact op met een deskundige.
Door de oorzaak te identificeren en de juiste maatregelen te nemen, kun je de gezondheid van je varen herstellen en toekomstige problemen voorkomen.


