5% off with code HELLO5
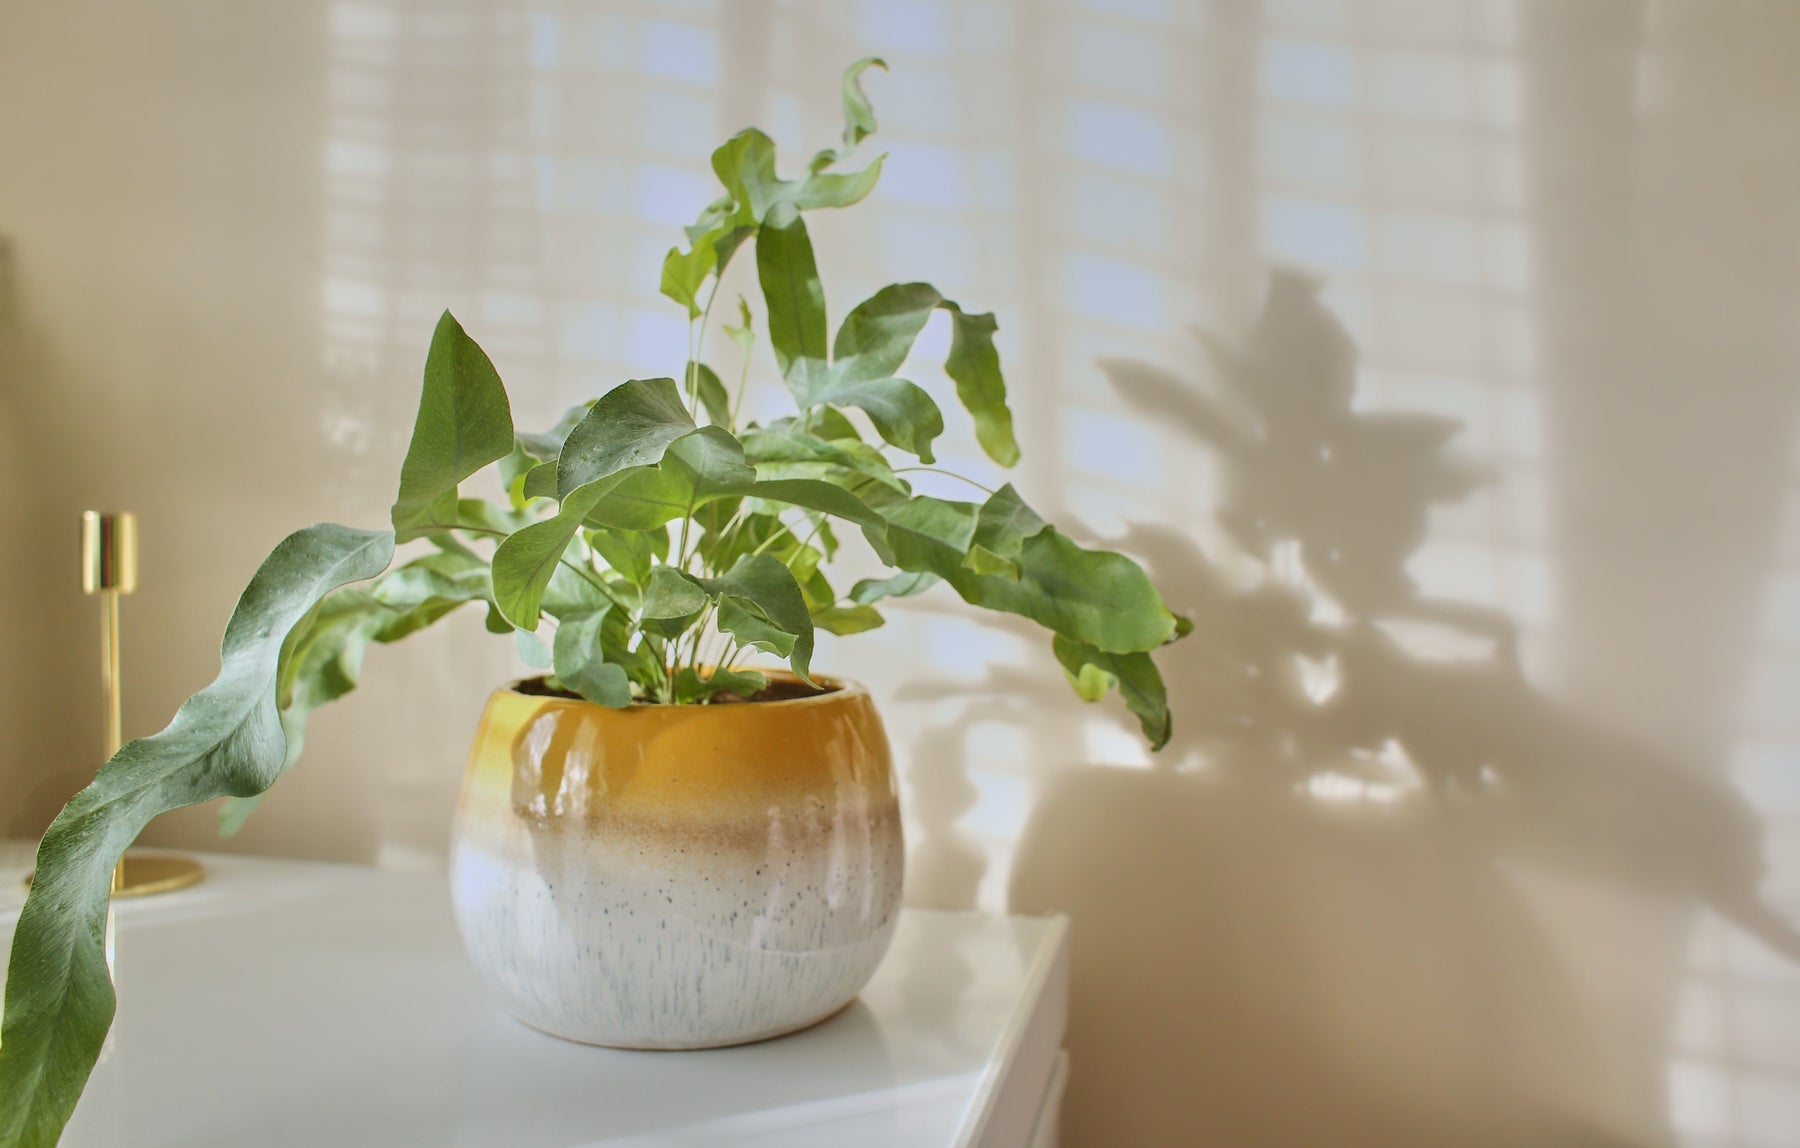
Blue Fern (Phlebodium) Care
The Blue Fern (or Phlebodium), with its beautiful blue-green leaves, brings a tropical atmosphere into your home. Whether you are an experienced plant enthusiast or just starting out, with the right care your Phlebodium houseplant will thrive and beautify your interior. In this blog, we share essential tips and advice for the best care of your Phlebodium, from the ideal location and watering to fertilization and potting soil selection. Discover the secrets of successful Phlebodium care!
Blue Fern - Phlebodium Species
The Phlebodium family includes several fascinating species, each with its own unique charm. The Phlebodium Blue Star stands out with its blue-green leaves that have a cool, soothing appearance. The Phlebodium Davana distinguishes itself with its graceful, finely branched leaves that add a touch of elegance to any interior. Finally, the Phlebodium Aureum is known for its golden sheen, which creates a warm and inviting atmosphere. Discover these beautiful varieties and choose the perfect Phlebodium for your home!
Watering the Blue Fern - Phlebodium
Proper watering is essential for the health and growth of your Phlebodium, also known as the blue fern. This plant thrives best in a humid environment, without the roots becoming waterlogged. Ensure that the potting soil remains evenly moist, but allow it to dry out slightly in between to prevent root rot. Preferably use rainwater or filtered water, and ensure a well-draining pot and saucer to drain excess water. Consistent and regular watering is the key to a vibrant and healthy Phlebodium.

How often should I water my Blue Fern - Phlebodium?
Phlebodiums like constantly moist soil, but not waterlogged. In the summer, watering twice a week may be sufficient, while in the winter, once a week is usually enough.
How do I know if my Blue Fern - Phlebodium is getting too much water?
Symptoms of overwatering are yellowing of the leaves and soggy, unpleasant-smelling soil. Ensure that excess water can drain away and the potting soil does not remain wet for too long.
Blue Fern - Phlebodium Misting
In addition to regular watering, the Phlebodium also loves high humidity. By regularly misting your Phlebodium with a fine mist of water, you can increase the humidity and keep the leaves fresh and healthy. This is especially important during dry winter months or in rooms with central heating. Preferably use rainwater or filtered water for this to prevent limescale on the leaves.
Blue fern - Phlebodium Location
Finding the right location for your Phlebodium is crucial for the health and vitality of this beautiful houseplant. Phlebodiums, also known as blue ferns, bring a touch of nature into your home with their graceful, blue-green leaves. To thrive optimally, they require specific light, temperature, and humidity conditions. Here are some tips to create the ideal environment for your Phlebodium.
Blue fern - Phlebodium Light requirements
Phlebodiums love bright, indirect light. Direct sunlight can burn the leaves, so avoid a spot where the sun shines directly on the plant. A place near a north- or east-facing window is ideal. If you do not have a suitable spot, a sheer curtain can help filter the light.
Blue Fern - Phlebodium Temperature
The ideal temperature for a Phlebodium is between 18°C and 24°C. They thrive in normal room temperatures, but avoid cold drafts and extreme heat from heating sources, such as radiators or fireplaces. A stable, moderate temperature promotes the best growth.
Blue Fern - Phlebodium Humidity
Phlebodiums need high humidity, especially during the winter months when the air is drier due to heating. Try to keep the humidity around the plant at a minimum of 50%. You can achieve this by regularly spraying the leaves with a fine mist, placing a humidifier nearby, or placing a tray of water and pebbles under the pot. By taking these measures, you create an environment in which your Phlebodium can flourish.

Blue Fern - Phlebodium Repotting
Repotting a Phlebodium is an important part of its care to ensure the plant has enough room to grow and the roots remain healthy. Here are some guidelines and tips for successfully repotting your Phlebodium.
When to Repot Blue Fern - Phlebodium
Repot your Phlebodium every two to three years, or when the roots are visibly growing out of the drainage holes of the pot. The best time to do this is in the spring, when the plant is in a growth phase.
Supplies Repotting Blue Fern - Phlebodium
- A new pot that is one size larger than the current pot and has drainage holes.
- Well-draining potting soil, preferably a mixture of peat moss, perlite, and orchid potting mix.
- Scissors or pruning shears to remove dead or damaged roots remove.
Steps for repotting Blue Fern - Phlebodium
1. Preparation:
- Water the Phlebodium a few days in advance so that the soil is slightly moist, which makes repotting easier.
- Make sure you have all the necessary materials at hand.
2. Removing from the old pot:
3. Checking roots: 4. Preparing the new pot:
5. Watering: 6. Aftercare: By repotting your Phlebodium correctly, you ensure that the plant remains healthy and has room to continue growing and flowering.
Fertilizing Blue Fern - Phlebodium
Fertilization is essential for the healthy growth of your Phlebodium, especially during the growing season from spring to early autumn. Use a balanced liquid houseplant fertilizer with an equal NPK ratio, such as 10-10-10, and add it to the water once a month during regular watering. Ensure that you do not exceed the recommended dose to prevent over-fertilization, which can cause root problems. Avoid fertilizing in the winter, when the plant is growing less actively, to prevent excess nutrients from accumulating in the soil. This helps your Phlebodium stay healthy and lush.
Blue Fern - Phlebodium Pruning
Pruning is an important care action for your Phlebodium, which helps keep the plant healthy and attractive. This blue fern generally requires little pruning, but regular maintenance can promote growth and improve the overall appearance.
How to Prune Blue Fern - Phlebodium?
Remove dead, yellowed, or damaged leaves with sharp, clean scissors to conserve the plant's energy and prevent the spread of disease. Cut the leaves as close to the base of the plant as possible, without damaging the healthy parts of the roots or stem.
When to Prune Blue Fern - Phlebodium?
The best time to prune is in early spring, when the plant begins to grow actively. Do not prune too much at once; limit yourself to removing only a few leaves at a time so as not to overstress the plant. By regularly pruning your Phlebodium, you keep the plant healthy and promote full and lush growth.
Blue Fern - Phlebodium Cuttings
Taking cuttings is an effective way to propagate new Phlebodium plants and expand your collection. Follow these steps for successful propagation of your blue fern:
-
Preparation: Choose a healthy, mature Phlebodium and wait until the growing season (spring or early summer) to take cuttings, when the plant is actively growing.
-
Taking cuttings: Cut off a healthy, non-flowering root ball with sharp, sterile scissors. Ensure that each cutting has at least one root node, which increases the chance of successful root growth.
-
Preparation: Carefully remove any dead or damaged roots from the cutting and leave it in a dry, shady spot for a few hours to allow the cuts to heal.
-
Pots: Fill a pot with well-draining potting soil, such as a mixture of peat moss and perlite. Place the cutting in the pot and fill with soil, ensuring that the root nodes are covered and the cutting stands firmly.
-
Care: Give the cutting slightly moist soil and place the pot in a spot with bright, indirect light. If necessary, cover the pot with a transparent plastic bag or a glass dome to maintain high humidity, which promotes root development.
-
Harvesting: After 6 to 8 weeks, the cuttings should develop roots. Carefully check for resistance when you remove the cutting from the pot. As soon as the roots are well developed, you can repot the new plant into a larger pot.
By following these steps, you can successfully propagate new Phlebodium plants and enjoy the expansion of your green collection.
Blue fern - Phlebodium Toxic
The Phlebodium, or blue fern, is a safe choice for both cats and humans. This attractive houseplant is non-toxic to cats, which means you don't have to worry if your curious four-legged friend occasionally tries a leaf. The Phlebodium is also completely harmless to humans, so you can place this beautiful plant in your home with peace of mind.
Is Blue Fern Air Purifying?
Yes, the Blue Fern (Phlebodium aureum) is often considered an air-purifying plant. Although not as well-known as some other air-purifying plants such as the Sansevieria or the Spider Plant, the Blue Fern contributes to healthier indoor air by improving humidity and reducing certain pollutants. Plants such as the Blue Fern help to increase humidity by releasing water into the air through their leaves, which can contribute to more pleasant and healthier air quality. This can be particularly useful in dry indoor environments, such as those with central heating or air conditioning. Additionally, all plants can contribute to filtering air pollutants to some extent, although the degree of effectiveness can vary between different plant species. The Blue Fern is therefore a beautiful and practical choice for improving your indoor environment.
Blue Fern - Phlebodium Discolored Leaves
Discolored yellow or brown leaves on your Phlebodium can have various causes and are often a sign that the plant is not in ideal conditions. Here are some common reasons for discolored leaves and how to solve them:
Excess or lack of water:
- Discoloration: Leaves can turn yellow with both overwatering and underwatering.
- Solution: Check the potting soil; it should be slightly moist but not waterlogged. Adjust your watering based on the seasons and the humidity in your home.
- Discoloration: Leaves can become pale or yellow if the plant receives too little light.
- Solution: Move the Phlebodium to a location with bright, indirect light. Avoid direct sunlight, which can burn the leaves.
- Discoloration: Dry air can lead to brown or yellowed leaf tips.
- Solution: Increase the humidity by spraying regularly, using a humidifier, or placing a bowl of water near the plant.
- Discoloration: Leaves may discolor due to a lack of essential nutrients.
- Solution: Fertilize the plant regularly with a balanced plant food according to the recommended instructions. Avoid over-fertilization, which can also be harmful.
- Discoloration: Fungal infections or pests can cause spots or discoloration on the leaves. Solution: Inspect the plant for signs of fungi or pests and treat with a suitable pesticide or fungicide if necessary.
Insufficient light:
Humidity:
Nutrients:
Fungus or pests:
By identifying the cause of the discoloration and taking the right steps, you can help your Phlebodium become healthy and lush again.


