5% off with code HELLO5
Asplenium (Nest Fern) Care
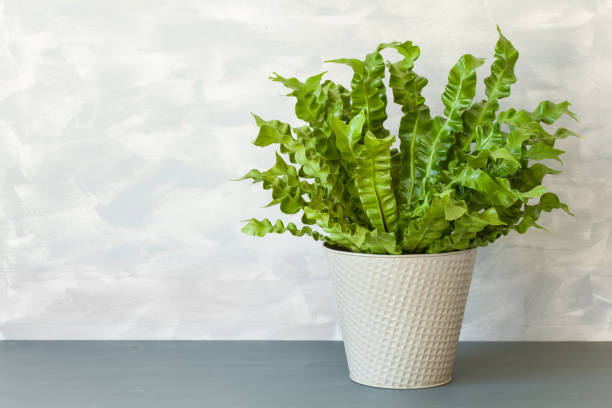
The Asplenium, also known as the finger fern or nestvaren, is a beautiful houseplant known for its lush, green leaves and unique appearance. The Asplenium belongs to the fern family, specifically to the Aspleniaceae family.
This plant is a great addition to any interior, as it is not only aesthetically pleasing but also relatively easy to care for. Whether you are an experienced plant enthusiast or just starting out with houseplants, understanding the basic care of the Asplenium will help you maintain a healthy and lush plant.

Asplenium Species
The Asplenium family comprises a diverse group of ferns, each with unique characteristics and care needs. Here are some popular varieties you can consider for your interior:
-
Asplenium nidus: Known as the bird's nest fern, this species has large, wavy leaves that grow in a rosette shape. It is one of the most recognizable Asplenium species due to its striking leaf structure.
-
Asplenium parvati: This species, also known as the Parvati variety, has a unique leaf structure with a delicate, refined appearance. It is a beautiful addition to any fern collection.
-
Asplenium crispy wave: The Crispy Wave is famous for its unique, curled leaves that have a wavy texture. This species adds a playful and striking aesthetic to any room.
-
Asplenium antiquum: Also known as the Antique Nest Fern, this species has robust growth and large, elegant leaves. It is a versatile plant that looks beautiful in both modern and traditional settings.
Each species has specific care needs, but they generally share the basic requirements of moist soil and indirect light. By choosing the right species for your space, you can enjoy the diverse beauty that Asplenium ferns have to offer.
Watering Asplenium
Watering your Asplenium is crucial for healthy growth, but it is important to find the right balance. The Asplenium likes constant moisture, but is sensitive to both drought and waterlogging.
How often should I water my Asplenium?
Generally, you should water your Asplenium once a week. However, this can vary depending on environmental conditions such as temperature, humidity, and the size of the pot.
Check the moisture: Check the top layer of the potting soil. If the top 2-3 cm feels dry, it is time to water. Feel the soil regularly to determine if the plant needs water.
Adapting to seasons: In winter, when the plant is growing less actively, the frequency of watering can be reduced. Check the soil moisture and adjust watering based on the plant's needs.
Watering tips: Ensure the pot has good drainage to remove excess water. Water slowly until it starts dripping from the bottom of the pot, so that the roots become evenly moist.
By regularly checking the soil and watering your Asplenium consistently, you can contribute to a healthy and lush plant.

Spraying Asplenium
Regularly spray the leaves of your Asplenium with a plant sprayer to increase the humidity around the plant, especially in dry indoor conditions. This helps to promote healthy growth and prevents the leaves from drying out.
Asplenium Location
The location of your Asplenium plays a crucial role in the health and appearance of this houseplant. Asplenium species, such as the bird's nest fern and crispy wave, have specific requirements for light, temperature, and humidity to thrive optimally.
Where should I place my Asplenium?
Place your Asplenium in a spot with bright, indirect light. Direct sunlight can burn the leaves, so a spot near a window with filtered light or a few meters away from a window is ideal. Also avoid completely dark corners, as the plant needs sufficient light for healthy growth.
What is the ideal temperature for my Asplenium?
The Asplenium grows best at temperatures between 18°C and 24°C. Protect the plant from cold drafts and temperature fluctuations, as extreme cold or heat can affect the plant's health.
How can I optimize the humidity for my Asplenium?
Aspleniums thrive in higher humidity. Ensure a humidity of 40-60% by regularly misting the plant or placing a humidifier nearby. Avoid placing the plant near heating elements or air conditioners, which can dry out the air.
Can the Bird's Nest Fern be kept outdoors?
The bird's nest fern (Asplenium) is primarily a houseplant and does best indoors where temperature and humidity can be controlled. The plant can be placed outdoors temporarily during the warmer months, as long as you ensure that it is not exposed to direct sunlight and that the humidity remains high. Protect the bird's nest fern from cold temperatures and extreme weather conditions by bringing it back indoors during cooler periods. By placing your Asplenium in the right spot and adjusting the environmental conditions to its needs, you can ensure that your plant remains healthy and retains its beautiful leaves.

Repotting Asplenium
Repotting your Asplenium is an important step in the care of this plant. It helps to provide the plant with fresh potting soil and more room for the roots to grow. Regular repotting prevents root rot and other problems that can occur if the plant remains in the same pot for too long.
Steps for Repotting your Asplenium:
1. Choose the Right Time:
- Timing: Ideally, repot your Asplenium in the spring or early summer, when the plant is actively growing. Avoid repotting during the winter months, when the plant is less active.
2. Select a Pot:
- Pot Size: Choose a plantpot that is approximately 2-3 cm larger in diameter than the current pot. A pot that is too large can lead to waterlogging, so choose a pot that is just slightly larger.
3. Prepare the Potting Soil:
4. Remove the Plant: 5. Inspect and Remove Old Potting Soil: 6. Place the Plant in the New Pot: 7. Watering: 8. Aftercare: By following these steps, you can ensure that your Asplenium is well cared for during repotting, which contributes to healthy growth and a beautiful, lush plant.
Asplenium Fertilization and Nutrition
Fertilization is essential for maintaining a healthy and lush Asplenium. By regularly providing the right nutrition, you support the plant in its growth process and ensure that it receives the nutrients needed for optimal development.
Steps to Fertilize Asplenium
1. Choose the Right Fertilizer:
- Fertilizer Type: Use a balanced liquid fertilizer for houseplants. A fertilizer with an equal ratio of nitrogen (N), phosphorus (P), and potassium (K), such as 10-10-10 or 20-20-20, is ideal. Avoid fertilizers with a high phosphorus content, as this can damage the roots.
- Ratio: Dilute the fertilizer according to the instructions on the packaging. Over-fertilization can be harmful, so use a solution that is approximately half the recommended strength.
- Frequency: Fertilize your Asplenium once a month during spring and summer, when the plant is actively growing. Avoid fertilizing during autumn and winter, when growth slows and the plant is dormant.
- Apply: Pour the diluted fertilizer evenly over the potting soil. Ensure that you do not touch the roots directly with the fertilizer solution. This helps to ensure an even absorption of nutrients.
- Check the Plant: Pay attention to your Asplenium's reaction to the fertilization. If the plant shows new growth and the leaves look healthy, your fertilization routine is likely correct. If you notice brown edges or other problems, this may indicate over-fertilization or a nutrient deficiency. By fertilizing regularly and correctly, you ensure that your Asplenium receives the right nutrition to remain healthy and lush. A well-thought-out fertilization routine is crucial for maintaining a strong, beautiful plant.
2. Apply Diluted:
3. When to Fertilize:
4. Application:
5. Observation and Adjustment:
Asplenium Potting Soil
For your Asplenium, it is important to choose potting soil that meets the specific needs of this fern. The right potting soil helps promote healthy root development and prevents problems such as root rot caused by poor drainage.
Recommended Potting Soil:
-
Good Drainage: Use a potting soil mixture that is well-draining. A mixture of peat moss, perlite, and a little compost works excellently. This ensures that excess water drains away well and prevents the roots from standing in stagnant water.
-
General Fern Potting Soil: You can also use specialized potting soil for ferns, for example from Culvita. These mixtures are often designed to meet the needs of ferns by providing a good balance between moisture retention and drainage.
-
Alternatives: If you do not have specialized potting soil, you can also use a standard potting soil mixture and improve it with a handful of perlite or sand to enhance drainage. This mixture must be able to provide sufficient air and space for the roots of your Asplenium.
Why This Is Important:
-
Prevents Root Rot: Well-draining potting soil prevents water from accumulating around the roots, which can cause root rot and other problems.
-
Supports Healthy Growth: Potting soil with good air circulation and moisture balance ensures a sturdy root structure and promotes healthy plant growth.
By choosing the right potting soil and regularly checking that the drainage is optimal, you ensure that your Asplenium remains healthy and can grow optimally.
Asplenium Cuttings
Taking cuttings is an effective way to propagate your Asplenium and grow new plants. This process can be easily carried out and offers a great way to expand your collection or to give new plants to friends and family.
Steps to Propagating Asplenium Cuttings
1. Choose a Healthy Plant:
- Selection: Choose a healthy Asplenium with strong, undamaged leaves. Ensure that the plant shows no signs of disease or pests.
2. Cut the Cuttings:
3. Let the Cutting Dry: 4. Prepare the Potting Soil:
5. Plant the Asplenium Cuttings: 6. Create a Humid Environment: 7. Place the Pot: 8. Check and Maintenance: By following these steps, you can successfully propagate new Asplenium plants and enjoy a healthy addition to your houseplant collection.
Asplenium Toxic
Asplenium, also known as the bird's nest fern, is generally not toxic to humans or pets, including cats. This houseplant is safe to have in the home and poses no risk to the health of your family members or pets if they accidentally consume a small part of the plant. Although the plant's sap is not toxic, some people or pets may react sensitively, which can lead to mild irritation. However, it remains wise to prevent pets, such as cats, from eating parts of the plant, simply as a precaution.
Pruning Asplenium
Pruning is an important part of caring for your Asplenium. It helps keep the plant healthy, stimulates new growth, and ensures your plant looks its best.
Steps to Prune Asplenium
1. Inspect the Plant:
- Health: Regularly check your Asplenium for dead, damaged, or diseased leaves. These leaves can weaken the plant and must be removed.
2. Use Clean Tools:
- Pruning Tools: Use a sharp and clean knife or pruning shears to prevent infecting the plant with pathogens. Ensure your tools are properly disinfected before you start pruning.
3. Remove Dead and Damaged Leaves:
- Cut Correctly: Cut off the dead or damaged leaves at the base of the plant, where they are attached to the root ball. This helps the plant conserve energy and stimulate new, healthy growth.
4. Vorm de Plant:
- Vormgeving: Als je Asplenium te groot wordt of ongewenste groei vertoont, kun je ook de lange, ongecontroleerde bladeren voorzichtig inkorten. Dit bevordert een compactere groei en een nettere uitstraling.
5. Verzorging Na het Snoeien:
- Onderhoud: Na het snoeien is het belangrijk om de plant goed te verzorgen. Zorg voor voldoende licht, de juiste hoeveelheid water en een goede luchtvochtigheid om te helpen bij het herstel en de groei van nieuwe bladeren.
Door regelmatig te snoeien en de juiste technieken toe te passen, houd je je Asplenium gezond en mooi. Snoeien helpt niet alleen de esthetiek van de plant, maar bevordert ook de algehele gezondheid en vitaliteit.
Asplenium Bruine Bladeren
Bruine bladeren bij je Asplenium kunnen verschillende oorzaken hebben en zijn vaak een teken dat de plant niet optimaal wordt verzorgd. Het is belangrijk om de oorzaak te achterhalen om de gezondheid van je plant te herstellen en verdere schade te voorkomen.
Oorzaken van Bruine Bladeren en Oplossingen Asplenium
1. Te Weinig Vocht:
- Oorzaak: Aspleniums hebben een hoge luchtvochtigheid nodig. Te droge lucht kan leiden tot bruine randen of tips op de bladeren.
- Oplossing: Verhoog de luchtvochtigheid rondom de plant door regelmatig te sproeien, een luchtbevochtiger te gebruiken of een schaal met water in de buurt van de plant te plaatsen.
2. Overbewatering of Onderbewatering:
- Oorzaak: Zowel te veel als te weinig water kan bruine bladeren veroorzaken. Overbewatering kan leiden tot wortelrot, terwijl onderbewatering de bladeren kan uitdrogen.
- Oplossing: Controleer de vochtigheid van de potgrond. Houd de grond gelijkmatig vochtig, maar niet drassig. Zorg ervoor dat de pot goed doorlatend is en dat overtollig water goed kan weglopen.
3. Direct Zonlicht:
- Oorzaak: Directe blootstelling aan zonlicht kan de bladeren verbranden en bruine vlekken veroorzaken.
- Oplossing: Zet je Asplenium op een plek met helder, indirect licht. Vermijd direct zonlicht, dat de bladeren kan beschadigen.
4. Voedingsgebrek:
- Oorzaak: Een tekort aan essentiële voedingsstoffen kan leiden tot bruine vlekken of randen op de bladeren.
- Oplossing: Bemest de plant met een uitgebalanceerde kamerplantenmeststof volgens de instructies. Bemest alleen tijdens het groeiseizoen en vermijd overbemesting.
5. Ziekten of Plagen:
- Oorzaak: Sommige ziekten of plagen kunnen bruine vlekken op de bladeren veroorzaken.
- Oplossing: Inspecteer de plant op tekenen van ziekte of ongedierte. Behandel indien nodig met een geschikt plantengif of fungicide en verwijder aangetaste bladeren.
Door de oorzaak van de bruine bladeren te identificeren en de juiste maatregelen te nemen, kun je je Asplenium helpen herstellen en zorgen voor een gezonde en weelderige plant.

Door de bovenstaande verzorgingstips te volgen, kun je ervoor zorgen dat je Asplenium gezond en weelderig blijft, en kun je optimaal genieten van deze prachtige kamerplant in je huis.


