5% de descuento con el código HELLO5
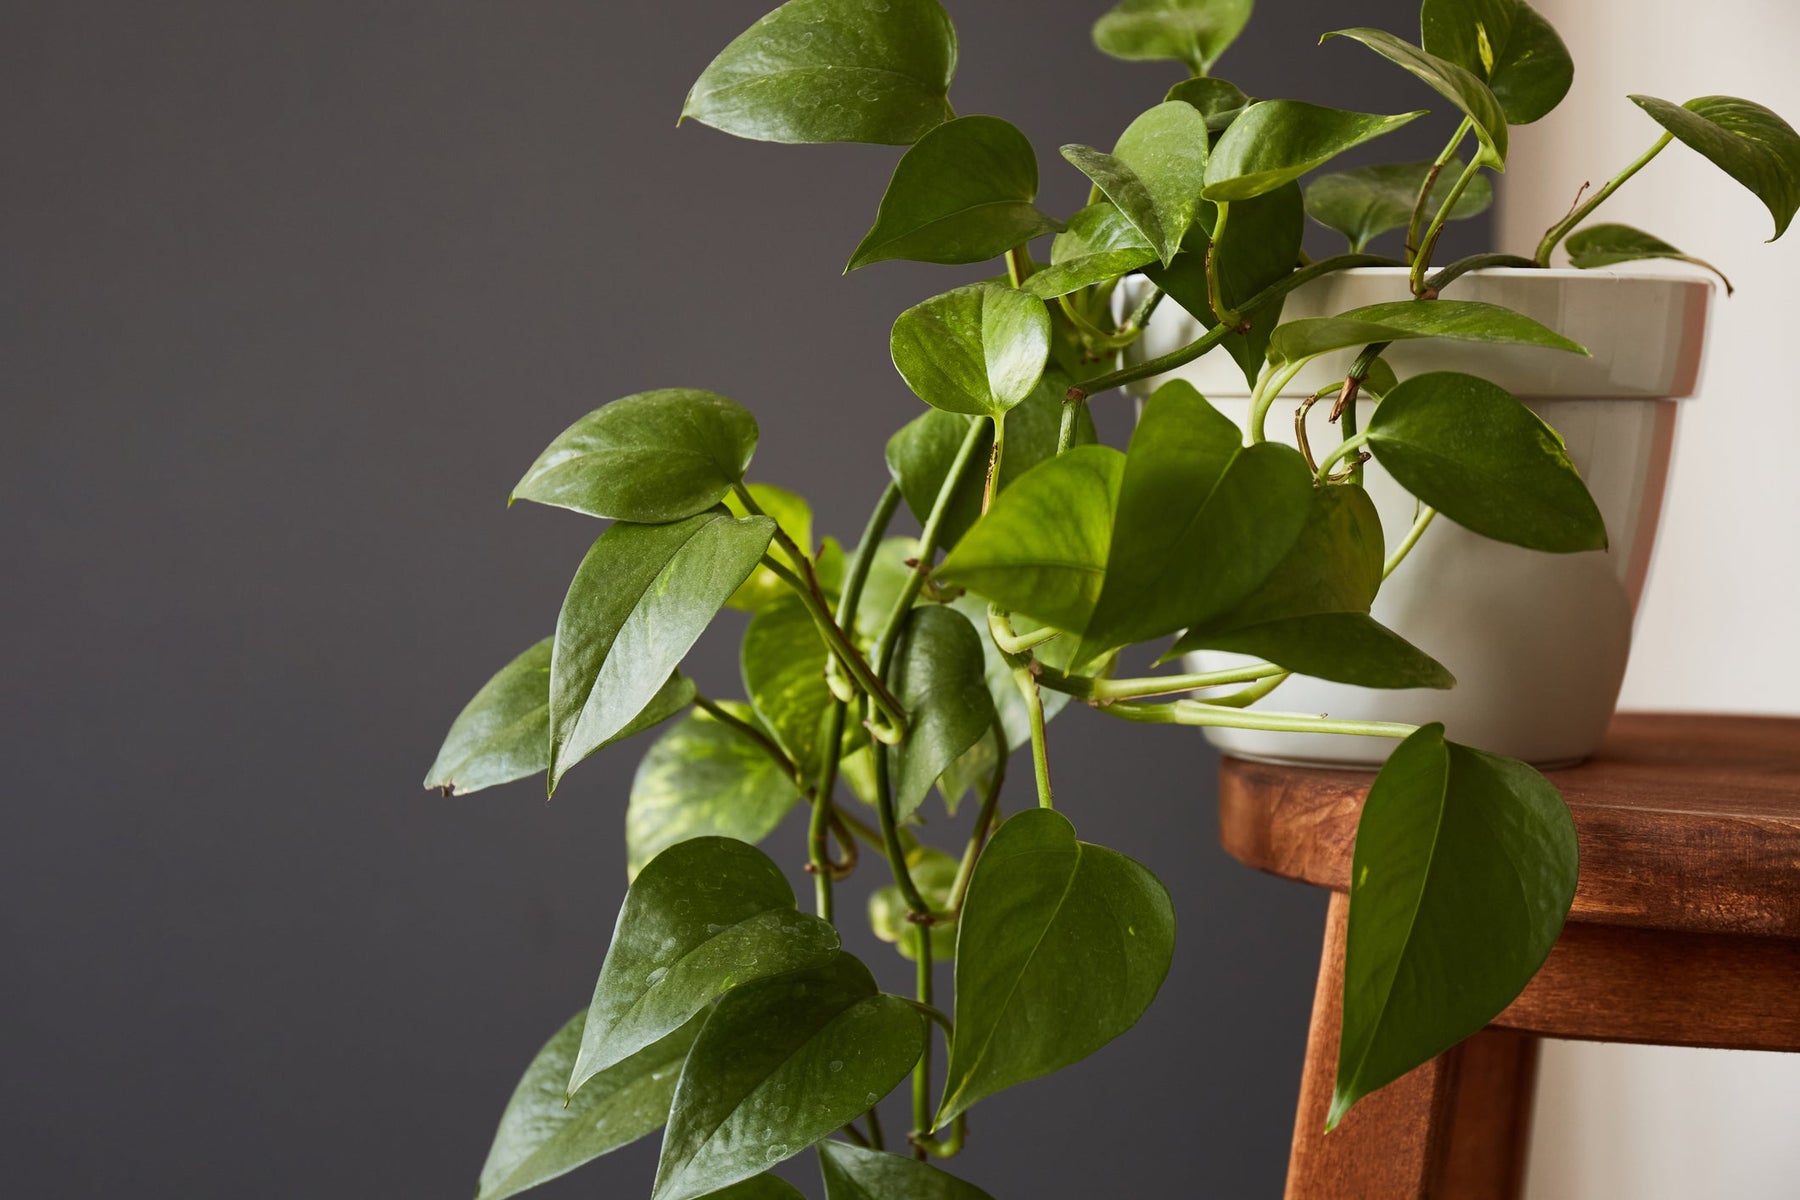
Cuidados de Scindapsus
El Scindapsus, también conocido como Epipremnum o
 Especies de Scindapsus
La hiedra dragón, o Scindapsus pictus 'Exotica', es otra variedad muy conocida dentro del género Scindapsus. Esta variedad es conocida por sus llamativas manchas plateadas sobre hojas verde oscuro, lo que la convierte en una opción muy apreciada entre los aficionados a las plantas de interior.
Otra variedad popular es la Scindapsus Marble Queen, que debe su nombre a los singulares patrones que imitan el mármol en sus hojas. Esta variedad presenta una mezcla de manchas verde oscuro y color crema, lo que confiere a cada hoja un diseño hermoso y único. La Marble Queen no solo es estéticamente atractiva, sino que también es relativamente fácil de cuidar. Se desarrolla bien con luz indirecta y se adapta a diversos entornos. Esto la convierte en una excelente opción tanto para principiantes como para amantes de las plantas con experiencia que desean alegrar su hogar con una planta llamativa y elegante.
Riego de un Scindapsus
Cómo regar un Scindapsus
El Scindapsus es una planta de interior fácil de cuidar que prospera con un mínimo de atención, pero regarla correctamente es esencial para un crecimiento saludable. A esta planta le gusta la tierra húmeda, pero no tolera el exceso de agua en las raíces, por lo que un buen equilibrio es importante. Demasiada agua puede provocar la pudrición de las raíces, mientras que muy poca agua puede hacer que las hojas se marchiten.
A continuación, respondemos a las preguntas más frecuentes sobre el riego de tu Scindapsus.¿Con qué frecuencia debo regar mi Scindapsus?
Lo ideal es regar tu Scindapsus en cuanto los 2-3 centímetros superiores de la tierra estén secos. Esto suele ser una vez por semana, pero puede variar según la temperatura y la humedad de tu hogar. En invierno, la planta suele necesitar menos agua, mientras que en verano se seca un poco más rápido.
Asegúrese siempre de que el exceso de agua drene correctamente para evitar la pudrición de las raíces.
¿Cuánta agua necesita mi Scindapsus?
Su Scindapsus necesita suficiente agua para mantener la tierra uniformemente húmeda, sin que se encharque. Riega hasta que veas que sale agua por los orificios de drenaje en la parte inferior de la maceta. Asegúrate de que el exceso de agua drene para que la planta no se quede encharcada, ya que esto puede provocar la pudrición de las raíces. Es mejor regar un poco menos de lo necesario que regar demasiado.
¿Puedo pulverizar mi Scindapsus?
Sí, ¡claro que puedes pulverizar tu Scindapsus! Esta planta adora la alta humedad, así que pulverizar las hojas con regularidad puede ayudar a mantenerla sana. Sobre todo en invierno, cuando el aire de la casa está más seco debido a la calefacción, es buena idea rociar las hojas con agua varias veces por semana. Esto no solo ayuda a aumentar la humedad, sino que también evita que las hojas se sequen o desarrollen bordes marrones.
![]()
![]()
![]()
![]()
![]()
Ubicación de Scindapsus
Las plantas de Scindapsus prosperan con luz brillante indirecta, pero también pueden sobrevivir en sombra parcial. Elija un lugar en la casa donde la planta reciba suficiente luz, como cerca de una ventana orientada al este o al oeste. También pueden prosperar en ambientes con luz artificial, pero evite la luz solar directa, ya que puede quemar las hojas.
¿Puede un Scindapsus vivir sin sol?
Aunque las plantas Scindapsus prosperan mejor con suficiente luz, pueden sobrevivir en entornos con menos luz solar. Preferiblemente, colóquelas en un lugar con luz solar indirecta, pero también pueden sobrevivir en ambientes con luz artificial, como oficinas.
 ¿Cuánto tiempo vive un Scindapsus?
Las plantas de Scindapsus generalmente tienen una larga vida útil y pueden prosperar durante años con los cuidados adecuados.
Con riego regular, luz suficiente y abono ocasional, estas plantas pueden ser un complemento duradero para tu hogar.
¿Cómo puedo cultivar mi Scindapsus?
Para cultivar tu planta Scindapsus, asegúrate de que la maceta tenga buen drenaje y utiliza tierra para macetas con buen drenaje.
Fertilice la planta ocasionalmente con un fertilizante equilibrado durante la temporada de crecimiento (primavera y verano), pero tenga cuidado de no sobrefertilizarla. ¿Qué tan rápido crece el Scindapsus? Las plantas de Scindapsus son conocidas por su crecimiento relativamente rápido, especialmente en condiciones favorables. En condiciones de cultivo ideales, con suficiente luz, agua y nutrientes, pueden crecer unos 30 centímetros por año en promedio. Sin embargo, esta tasa puede variar dependiendo de factores como la especie específica de Scindapsus, las condiciones ambientales y los cuidados que reciba la planta. En general, las plantas de Scindapsus son bastante resistentes y pueden prosperar rápidamente en un entorno bien cuidado. ¿Necesitan nutrientes las plantas de Scindapsus? Sí, las plantas de Scindapsus necesitan nutrientes, aunque en menor cantidad que muchas otras plantas de interior. Utilice un fertilizante equilibrado especialmente formulado para plantas de interior y siga las instrucciones del envase para la dosis y frecuencia correctas.Esquejes de Scindapsus
Tomar esquejes de un Scindapsus es una forma sencilla y eficaz de crear nuevas plantas o propagar una planta existente. Esta popular planta de interior es ideal para esquejes porque enraíza fácilmente y crece rápidamente. Aquí tienes una guía paso a paso para propagar tu Scindapsus.
¿Por qué propagar Scindapsus?
Hay varias razones para propagar tu Scindapsus:
- Propagación: La propagación es una excelente manera de ampliar tu colección o de regalar a tus amigos y familiares un esqueje de tu planta.
- Salud de la planta: Al eliminar los tallos viejos o marchitos, puedes mejorar la salud y el crecimiento general de la planta.
- Plantas decorativas: Los esquejes se pueden colocar en macetas o jarrones, lo que puede ser un hermoso complemento para tu hogar.
¿Cuándo propagar Scindapsus?
Lo mejor es propagar Scindapsus en primavera o principios de verano, cuando la planta está en su mejor momento. La planta crece activamente. Esto aumenta la probabilidad de que se formen raíces con éxito.
Pasos para esquejes de Scindapsus
1. Reúna los materiales:
- Unas tijeras afiladas y limpias o un cuchillo pequeño
- Macetas pequeñas con tierra para macetas o un vaso de agua
- Bolsa de plástico o una película de plástico transparente (opcional)
- Hormona de enraizamiento (opcional, pero puede promover la formación de raíces)
Busque un tallo sano con al menos 2 o 3 hojas. Evite los tallos marchitos o dañados.
3. Corte:
Corte el tallo justo debajo de un nudo (donde una hoja se une al tallo) con unas tijeras afiladas o un cuchillo pequeño. Asegúrese de que el corte sea en ángulo; Esto aumenta la superficie para la formación de raíces.
4. Preparación:
Si dispone de hormona de enraizamiento, sumerja el extremo del esqueje en el polvo. No es necesario, pero puede acelerar la formación de raíces.
5. Colocación en agua o tierra para macetas:
- En agua: Coloque el esqueje en un vaso con agua, asegurándose de que el agua cubra el nudo (el punto donde la hoja se une al tallo). Coloque el vaso en un lugar con luz brillante indirecta. Cambie el agua cada pocos días para mantenerla limpia y oxigenada.
-
En tierra para macetas: Inserte el esqueje a una profundidad de 2 a 5 centímetros en una maceta pequeña con tierra para macetas húmeda. Presione la tierra alrededor del corte para evitar bolsas de aire. Asegúrese de que el nudo quede por debajo de la superficie de la tierra.
6. Cobertura (opcional):
Si ha colocado el esqueje en tierra para macetas, puede poner una bolsa de plástico o papel de aluminio sobre la maceta para mantener la humedad alta. Asegúrese de permitir la entrada de aire regularmente para evitar la formación de moho.
7. Cuidado de sus esquejes:
Mantenga sus esquejes alejados de la luz solar directa, pero proporcióneles luz brillante indirecta. Si tiene el esqueje en agua, mantenga el agua a un nivel adecuado. Para esquejes en tierra para macetas, riegue cuando la capa superior se sienta seca.
8. Enraizamiento:
Después de unas semanas o unos meses, sus esquejes comenzarán a formar raíces. Con los esquejes en agua, puede ver crecer las raíces, mientras que con los esquejes en tierra, es posible que deba ser un poco paciente.
9. Trasplante:
En cuanto las raíces alcancen unos 5-7 cm de longitud, puedes trasplantar los esquejes a una maceta más grande o colocarlos en tu planta de Scindapsus.
Trasplante Scindapsus
Repotting your Scindapsus is an important step to ensure your plant stays healthy and can grow well. Here are some guidelines and tips to help you repot this popular houseplant.
Why Repot Scindapsus?
Scindapsus plants usually need to be repotted every 1 to 2 years, depending on their growth rate and pot size. Repotting is necessary for several reasons:
- Room for Growth: As your Scindapsus grows, it needs more room for its roots. A pot that is too small can hinder growth.
- Fresh Potting Soil: Old potting soil loses nutrients over time and can become compacted. Fresh potting soil ensures better drainage and nourishment for the plant.
- Health: If you notice that the plant is growing poorly, showing yellow leaves, or that there is root rot, repotting can help solve these problems.
When to Repot Scindapsus?
The best time to repot your Scindapsus is in the spring or early summer, when the plant is actively growing. This gives the roots a chance to adapt to the new pot and the fresh potting soil.
Steps for Repotting Scindapsus
-
Choose the Right Pot: Choose a pot that is approximately 2-5 centimeters larger in diameter than the current pot. Ensure that the new pot has drainage holes.
-
Prepare the New Pot: Fill the new pot with fresh potting soil. A well-draining potting mix, such as a mix for houseplants or a mix with perlite or coconut fibers, is ideal for Scindapsus.
-
Remove the Plant: Carefully remove the Scindapsus from the current pot. You can do this by gently turning the pot upside down and tapping the bottom so that the plant slides out. If the roots are stuck, you can gently loosen them.
-
Inspect the Roots: Check the roots for signs of rot or damage. Cut away any rotten or dead roots with clean scissors. This helps the plant grow healthier.
-
Place the Plant in the New Pot: Place the Scindapsus in the center of the new pot and fill the empty spaces around the roots with potting soil. Ensure that the top of the roots is just below the rim of the pot.
-
Watering: Water the plant well after repotting so that the potting soil is thoroughly soaked. This helps the roots adapt to their new environment.
-
Place the Plant in the Right Spot: Place your Scindapsus in a spot with bright, indirect light and avoid direct sunlight during the first few days after repotting. This helps the plant recover from the stress of repotting.
Care for Scindapsus After Repotting
Keep a close eye on the plant for the first few weeks. Do not water the Scindapsus again until the top layer of the potting soil feels dry. This helps prevent root rot while the roots adapt to their new pot and potting soil.
By following these steps, you ensure that your Scindapsus is repotted properly and continues to thrive in its new environment!
Scindapsus Pruning
Waarom heeft mijn Scindapsus gele bladeren?
Als je Scindapsus gele bladeren heeft, zijn er een paar mogelijke oorzaken:
1. Te Veel Water
Scindapsus houdt niet van te veel water. Als de grond constant vochtig blijft, kunnen de wortels gaan rotten, wat kan leiden tot gele bladeren. Laat de grond tussen gietbeurten goed opdrogen voordat je opnieuw water geeft. Controleer ook of de pot voldoende drainagegaten heeft om overtollig water af te voeren.
2. Te Weinig Licht
Hoewel Scindapsus redelijk tolerant is ten opzichte van lichtomstandigheden, heeft het nog steeds voldoende licht nodig om gezond te blijven. Als de plant niet genoeg licht krijgt, kunnen de bladeren geel worden en kan de groei vertragen. Probeer de plant op een plek te plaatsen met helder, indirect licht voor optimale groei.
3. Te Veel Direct Zonlicht
Hoewel Scindapsus van licht houdt, kan te veel direct zonlicht de bladeren verbranden en doen verkleuren. Dit leidt vaak tot bruine vlekken of vergeling. Zorg ervoor dat je Scindapsus zich op een plek bevindt waar het beschermd is tegen direct zonlicht, maar wel genoeg licht krijgt.
4. Voedingsproblemen
Een tekort aan voedingsstoffen kan ook leiden tot gele bladeren. Dit komt vaak voor als de plant lange tijd niet is bemest. Geef de plant regelmatig een uitgebalanceerde meststof volgens de instructies op de verpakking om ervoor te zorgen dat hij alle benodigde voedingsstoffen krijgt. Dit is vooral belangrijk tijdens het groeiseizoen in de lente en zomer.
Door deze mogelijke oorzaken te controleren, kun je hopelijk de reden achterhalen waarom je Scindapsus gele bladeren heeft. Neem de juiste maatregelen om het probleem op te lossen en zorg ervoor dat je plant weer gezond en weelderig kan groeien.
Scindapsus Giftig?
De Epipremnum, waaronder ook de Scindapsus valt, heeft enkele giftige soorten die schadelijk kunnen zijn voor katten. Als er per ongeluk een deel van de plant wordt ingeslikt, is het verstandig om bij twijfel direct contact op te nemen met een huisarts of dierenarts. Deze planten staan bekend om hun luchtzuiverende eigenschappen en kunnen onder bepaalde omstandigheden overtollige voedingsstoffen afvoeren via kleine druppeltjes op de bladeren. Dit gebeurt meestal bij een hoge luchtvochtigheid of wanneer ze te veel water krijgen. Door de plant wat droger te houden, kun je dit "druppelen" verminderen. De druppels zelf zijn echter niet giftig.![]()

Is de Scindapsus luchtzuiverend?
Ja, de Scindapsus staat bekend om zijn luchtzuiverende eigenschappen. Net als veel andere kamerplanten kan de Scindapsus helpen bij het zuiveren van de lucht in huis door schadelijke gifstoffen te absorberen en om te zetten in zuurstof. Hierdoor kan het bijdragen aan een schonere en gezondere binnenomgeving.
Hoe kan ik mijn Scindapsus gezond houden?
Naast het bieden van de juiste hoeveelheid water en licht, is regelmatig afstoffen van de bladeren belangrijk om de plant gezond te houden. Controleer ook regelmatig op tekenen van plagen of ziekten en behandel ze indien nodig. Met de juiste zorg en aandacht zal jouw Scindapsus plant een prachtige aanvulling zijn op je interieur!
Nog meer verzorgingstips voor je planten:
- Strelitzia Verzorging
- Strelitzia Nicolai Verzorging
- Monstera Verzorging
- Alocasia Verzorging
- Calathea Verzorging
- Yucca Verzorging
- Lepelplant Verzorging
- Citrusbomen Verzorging
- Citroenboom Verzorging
- Areca Palm Verzorging
- Vetplanten Verzorging
- Cactus Verzorging
- Sansevieria Verzorging
- Philodendron Verzorging
- Scindapsus Verzorging
- Pilea (Pannenkoekenplant) Verzorging
- Nerium Oleander Verzorging
- Bananenplant Verzorging


